Monitoring the weather is a classic maker project. But why stop at displaying it on a small LCD? In this tutorial, we'll build a Wi-Fi Weather Station using an ESP8266 (NodeMCU) that serves a web page you can access from any phone or computer on your network!
How it Works
The ESP8266 will connect to your home Wi-Fi and act as a web server. When you type its IP address into your browser, it will send back an HTML page containing the current temperature and humidity readings from a DHT sensor.
What You'll Need:
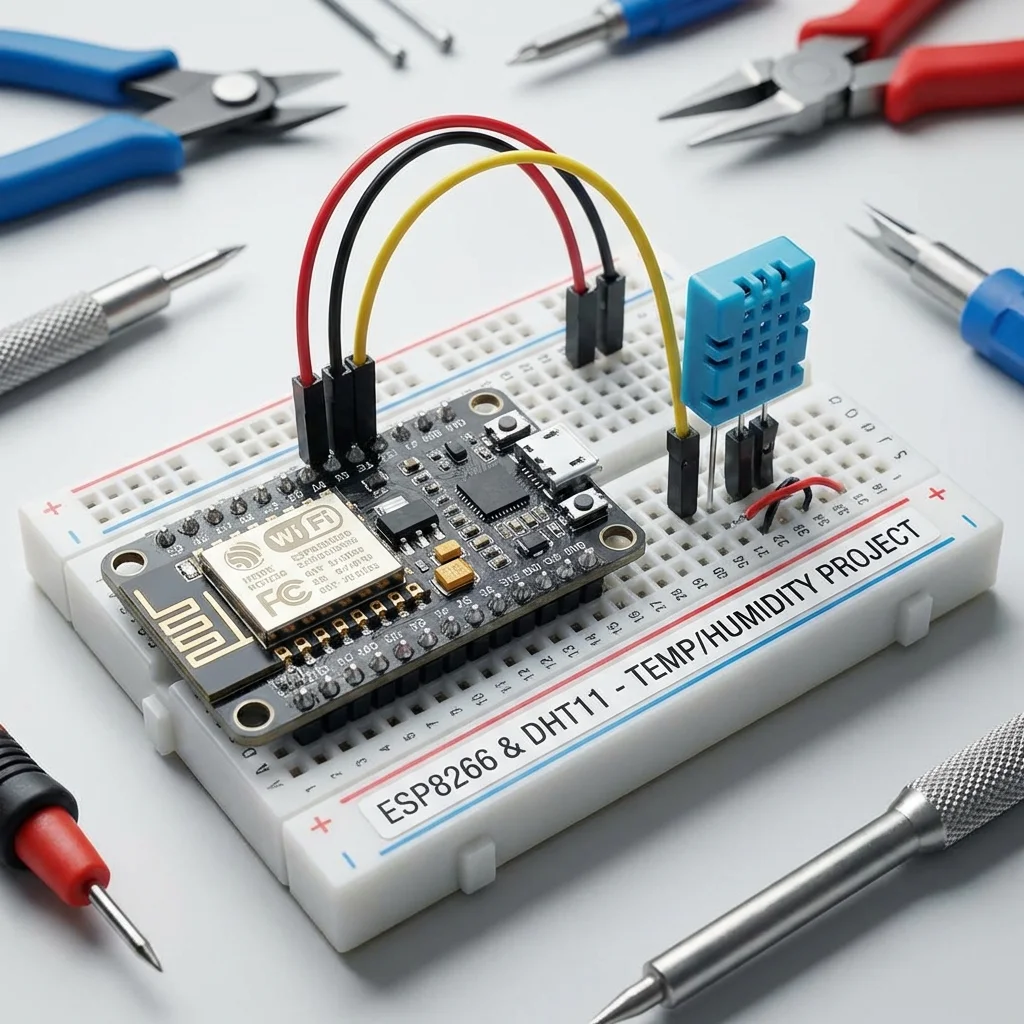
- NodeMCU ESP8266 Board
- DHT11 or DHT22 Sensor
- Jumper Wires & Breadboard
- Arduino IDE (with ESP8266 board support installed)
Wiring
- DHT VCC -> NodeMCU 3.3V
- DHT GND -> NodeMCU GND
- DHT DATA -> NodeMCU D1 (GPIO 5)
The Code
We'll use the `ESP8266WebServer` library. Make sure you also install the `DHT sensor library` by Adafruit from the Library Manager.
#include <ESP8266WiFi.h>
#include <ESP8266WebServer.h>
#include <DHT.h>

// Replace with your Network Credentials
const char* ssid = "YOUR_WIFI_SSID";
const char* password = "YOUR_WIFI_PASSWORD";

#define DHTPIN 5     // Digital pin D1
#define DHTTYPE DHT11   // DHT 11

DHT dht(DHTPIN, DHTTYPE);
ESP8266WebServer server(80);

void handleRoot() {
  float h = dht.readHumidity();
  float t = dht.readTemperature(); // Celsius

  String html = "<!DOCTYPE html><html>";
  html += "<head><meta name=\"viewport\" content=\"width=device-width, initial-scale=1\">";
  html += "<style>body{font-family: sans-serif; text-align: center; margin-top: 50px;}";
  html += "h1{color: #444;} .sensor{font-size: 2rem; margin: 20px;}</style></head>";
  html += "<body><h1>ESP8266 Weather Station</h1>";

  if (isnan(h) || isnan(t)) {
    html += "<p>Failed to read from DHT sensor!</p>";
  } else {
    html += "<div class=\"sensor\"><b>Temp:</b> " + String(t) + " °C</div>";
    html += "<div class=\"sensor\"><b>Humidity:</b> " + String(h) + " %</div>";
  }

  html += "</body></html>";

  server.send(200, "text/html", html);
}

void setup() {
  Serial.begin(115200);
  dht.begin();

  // Connect to Wi-Fi
  WiFi.begin(ssid, password);
  while (WiFi.status() != WL_CONNECTED) {
    delay(500);
    Serial.print(".");
  }

  Serial.println("");
  Serial.print("Connected! IP Address: ");
  Serial.println(WiFi.localIP());

  server.on("/", handleRoot);
  server.begin();
}

void loop() {
  server.handleClient();
}
Running the Project
- Upload the code to your ESP8266.
- Open the Serial Monitor (115200 baud).
- Wait for the connection message. Copy the IP Address shown (e.g., 192.168.1.15).
- Enter that IP address into your phone or computer's web browser.
- Voila! You should see the live temperature and humidity.