Display custom messages or sensor data on a 16x2 LCD (Liquid Crystal Display) using your Arduino. We'll cover both the traditional direct wiring method and the much simpler I2C module method.
Why an LCD?
LCDs are invaluable for projects that need to provide immediate visual feedback without a computer, such as displaying temperature, sensor readings, countdown timers, or simple status messages.
Method 1: Direct Wiring (Many Connections)
This method involves connecting many pins directly from the LCD to the Arduino. While educational, it consumes a significant number of Arduino's digital pins.
What You'll Need:
- Arduino board
- 16x2 LCD Module
- 10k Ohm Potentiometer (for contrast adjustment)
- 220 Ohm Resistor (for backlight current limiting)
- Breadboard & plenty of Jumper Wires
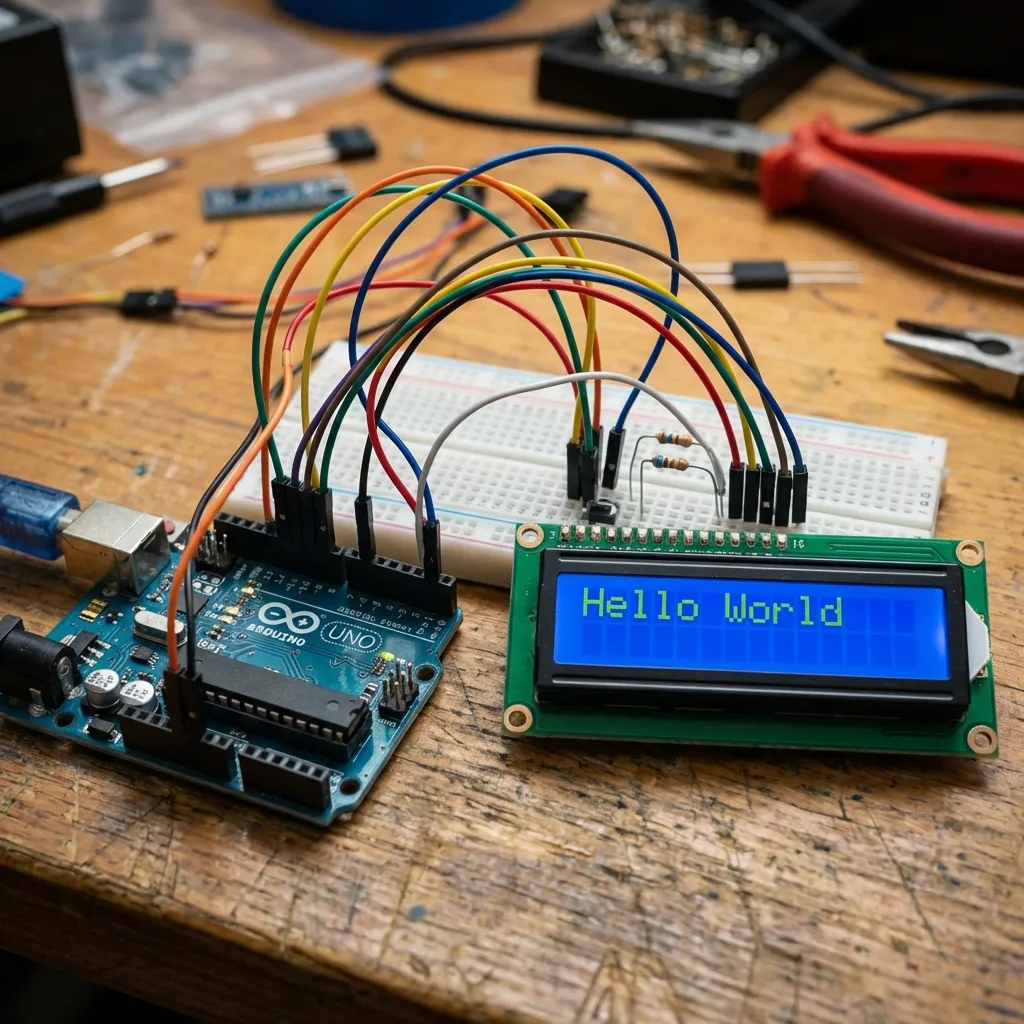
Wiring (Simplified Overview):
A direct 16x2 LCD connection typically uses 10-12 Arduino pins. This can quickly use up valuable pins for more complex projects.
Example of direct 16x2 LCD wiring (Note: detailed wiring diagram is complex and requires specific pin mappings).Method 2: Using an I2C Module (Recommended - Simpler)
The I2C (Inter-Integrated Circuit) backpack module is a small board that attaches to the back of your 16x2 LCD. It acts as an interface, allowing you to control the LCD using only two Arduino data pins (SDA and SCL), plus power (VCC) and ground (GND).
What You'll Need:
- Arduino board
- 16x2 LCD Module with I2C Backpack (this is usually sold as one unit, or you can buy the backpack separately)
- Jumper wires
- LiquidCrystal_I2C Library (install via Arduino IDE Library Manager)
Circuit Diagram (I2C Module):
This method is far cleaner and saves many Arduino pins for other sensors or components.
- LCD SDA pin (from I2C module) to Arduino A4 (SDA)
- LCD SCL pin (from I2C module) to Arduino A5 (SCL)
- LCD VCC (from I2C module) to Arduino 5V
- LCD GND (from I2C module) to Arduino GND
Arduino Code (I2C Module Example):
First, install the LiquidCrystal_I2C library via Sketch > Include Library >
Manage
Libraries... in the Arduino IDE.
#include <Wire.h>             // Required for I2C communication
#include <LiquidCrystal_I2C.h> // Include the I2C LCD library

// Set the LCD I2C address. Common addresses are 0x27 or 0x3F.
// You might need to run an I2C scanner sketch to find the correct address for your module.
// For a 16 columns and 2 rows display:
LiquidCrystal_I2C lcd(0x27, 16, 2); // (I2C address, columns, rows)

void setup() {
  lcd.init();      // Initialize the LCD
  lcd.backlight(); // Turn on the backlight (if your module has one)

  // Print a message to the LCD
  lcd.print("Hello, Maker!");
  lcd.setCursor(0, 1); // Set cursor to the beginning of the second line (column 0, row 1)
  lcd.print("MakerWorks!");
}

void loop() {
  // You can update the display here based on sensor readings, button presses, etc.
  // Example: Display elapsed time
  // lcd.setCursor(0, 0);
  // lcd.print("Time: ");
  // lcd.print(millis() / 1000); // Display seconds
}
Using the I2C module is highly recommended for its simplicity and reduced pin usage, making it ideal for most Arduino projects involving LCDs!