Welcome to the classic "Hello World" of Arduino! This tutorial will walk you through the simplest yet most fundamental project: making an LED blink. It's an excellent starting point for anyone new to Arduino and embedded systems, as it introduces basic concepts of circuit building and programming.
What You'll Need:
- Arduino board (Uno recommended)
- USB cable (for connecting Arduino to your computer)
- Breadboard
- 1 LED (any color)
- 1 x 220 Ohm Resistor
- Jumper wires
- Arduino IDE (Software installed on your computer)
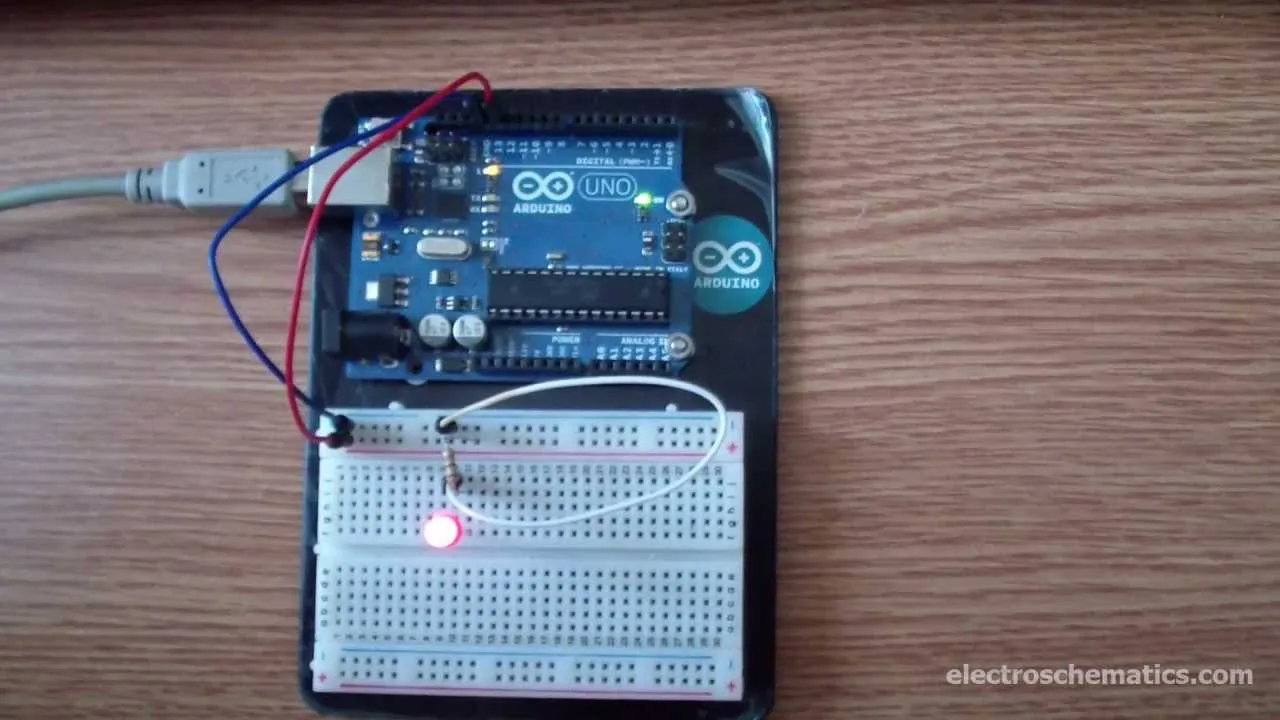
Circuit Diagram:
Connecting the components is straightforward:
- Connect the long leg (anode) of the LED to a 220 Ohm resistor.
- Connect the other end of the resistor to Arduino's digital pin 13.
- Connect the short leg (cathode) of the LED to the Arduino's GND (Ground) pin.
Arduino Code (Sketch):
Open your Arduino IDE and copy-paste the following code. This code will turn the LED on for 1 second, then turn it off for 1 second, repeatedly.
// the setup function runs once when you press reset or power the board
void setup() {
  // initialize digital pin 13 as an output.
  pinMode(13, OUTPUT);
}

// the loop function runs over and over again forever
void loop() {
  digitalWrite(13, HIGH);   // turn the LED on (HIGH is the voltage level)
  delay(1000);              // wait for a second (1000 milliseconds)
  digitalWrite(13, LOW);    // turn the LED off by making the voltage LOW
  delay(1000);              // wait for a second
}
Explanation of the Code:
setup(): This function runs once when the sketch starts.pinMode(13, OUTPUT);configures digital pin 13 to act as an output pin, meaning it can send voltage out.loop(): This function runs repeatedly aftersetup()finishes.digitalWrite(13, HIGH);: Sends a HIGH signal (5V) to pin 13, turning the LED on.delay(1000);: Pauses the program for 1000 milliseconds (1 second).digitalWrite(13, LOW);: Sends a LOW signal (0V) to pin 13, turning the LED off.delay(1000);: Pauses for another 1 second.
Uploading the Code:
- Connect your Arduino board to your computer via the USB cable.
- In the Arduino IDE, go to
Tools > Boardand select your Arduino board (e.g., "Arduino Uno"). - Go to
Tools > Portand select the serial port connected to your Arduino. - Click the "Upload" button (right arrow icon) in the Arduino IDE.
Once uploaded, you should see your LED blinking! Congratulations, you've just completed your first Arduino project!
Stay tuned for more exciting projects and tutorials from MakerWorks!